Every stunning photograph you've ever admired, from a vibrant magazine spread to a breathtaking Instagram post, likely has a secret ingredient: expert photo editing. It’s the invisible art that transforms a raw capture into a polished masterpiece, enhancing colors, perfecting light, and revealing the hidden narratives within your images. Understanding photo editing fundamentals isn't just a skill for professionals; it's a superpower for anyone who wants their pictures to truly pop, tell a story, or simply look their absolute best.
At a Glance: Your Photo Editing Journey Begins Here
- Why Edit? Photo editing isn't about faking it; it's about refining, correcting, and enhancing your images to truly convey your vision and evoke emotion.
- Get Ready: Back up your precious files, organize your shots, and set up a comfortable workspace before you even open software.
- Choose Your Weapon: From free tools like GIMP to industry standards like Adobe Lightroom, the right software depends on your goals and budget.
- Master the Basics: Learn composition, color correction, retouching, and the power of layers and masks.
- Export with Confidence: Understand resolution, file formats, and color spaces for web, print, or social media.
- Avoid Pitfalls: The biggest mistake? Over-editing. Aim for natural enhancement, not drastic alteration.
The Indispensable Role of Photo Editing in Modern Photography
Think of your camera as a brilliant capturing device, but photo editing as the masterful sculptor who chisels away imperfections and brings out the true form. It's not just about making things "look pretty"; it's about precision, storytelling, and ensuring your images resonate.
Why is this digital artistry so crucial today?
- Boosts Visual Appeal: Whether for social media, a professional portfolio, or marketing materials, an edited photo instantly grabs attention. Enhancing colors, adjusting composition, and perfecting lighting elevates an image from good to captivating.
- Corrects Imperfections: No shot is perfect straight out of the camera. Editing allows you to magically fix red-eye, banish blemishes, remove unwanted distractions, and compensate for less-than-ideal lighting conditions.
- Sets a Mood and Tells a Story: A warm, golden filter can evoke coziness; a stark black and white conversion might convey nostalgia or drama. Photo editing empowers you to craft the emotional tone and narrative of your images, turning mere pictures into powerful communication tools.
- Meets Technical Standards: Different platforms have different demands. Editing helps you optimize images for specific requirements – be it the ideal aspect ratio for Instagram, the high resolution needed for a print ad, or the compressed size for fast web loading.
- Maintains Brand Consistency: For businesses and personal brands, a cohesive visual identity is paramount. Editing ensures your photos align with a specific style, tone, and color palette, fostering recognition and trust across all your platforms.
In essence, photo editing transforms raw data into artistic expression, ensuring your vision is communicated clearly and compellingly. It’s an essential part of the creative process that every photographer, from hobbyist to seasoned pro, should embrace. For a broader perspective, you might explore a comprehensive Guide to editing that covers the entire spectrum of digital image manipulation.
Laying the Groundwork: Essential Preparations Before You Click "Edit"
Jumping straight into editing without preparation is like trying to bake a cake without gathering your ingredients. A little foresight goes a long way in saving time, preventing frustration, and ensuring your editing workflow is smooth and efficient.
1. Back Up Your Images: Your Digital Safety Net
This is non-negotiable. Imagine spending hours on a shoot, only for your hard drive to fail. Heartbreaking, right? Always back up your images immediately after a shoot.
- Dual Storage: Keep photos on your memory card initially, but swiftly transfer them to at least two other locations: your computer's hard drive and a cloud storage service (like Google Drive, Dropbox, or Adobe Creative Cloud). External hard drives are also excellent for local redundancy.
- Automate: Consider services that offer automatic backups to streamline this crucial step.
2. Organize Your Photos Like a Pro
A messy digital gallery is a productivity killer. You'll spend more time searching than editing.
- Logical Folders: Create a structured hierarchy. Start with broad categories (e.g., "Photography Projects") then narrow down by year, month, client name, or event type (e.g., "2023 > August > Wedding - Smith & Jones").
- Consistent Naming: Implement a consistent naming convention for your files (e.g.,
YYYYMMDD_ClientName_Description_001.RAW). This makes searching a breeze. - Keywords & Tags: Many photo management tools (like Lightroom) allow you to add keywords and ratings. Use them! Tagging images with relevant terms makes finding specific shots incredibly efficient later on.
3. Invest in a Productive Workspace
Your environment significantly impacts your creative output and comfort.
- Ergonomics First: A supportive chair and a desk at the right height are crucial for long editing sessions. Your posture will thank you.
- Proper Lighting: Avoid harsh overhead lights or strong window glare directly on your screen. Neutral, indirect ambient lighting is best to prevent eye strain and maintain accurate color perception.
- Monitor Quality: While you don't need a professional-grade Eizo monitor to start, a decent display with good color accuracy is important. If possible, calibrate your monitor regularly using a hardware calibrator to ensure colors you see are true to life.
- Computer Specifications: Photo editing software can be demanding. Aim for a computer with a fast processor (e.g., Intel i5/i7/i9 or AMD Ryzen 5/7/9), ample RAM (16GB minimum, 32GB or more for heavy use), and a dedicated graphics card. An SSD (Solid State Drive) for your operating system and active projects will dramatically speed up loading and processing times.
Picking Your Digital Canvas: Essential Photo Editing Software
The tool doesn't make the artist, but the right tool certainly makes the process smoother and more enjoyable. Choosing your photo editing software depends on your skill level, budget, and specific creative goals.
Top Contenders in the Editing Arena:
- Adobe Lightroom (Recommended for Beginners): Often considered the industry standard for photo management and non-destructive editing. It's user-friendly, intuitive, and offers powerful tools for everything from basic adjustments (exposure, white balance) to advanced color grading and organization. It's subscription-based, often bundled with Photoshop.
- GIMP (Free, Open-Source, Powerful): Standing for GNU Image Manipulation Program, GIMP is a robust, free alternative to Photoshop. It boasts a wide array of features for retouching, image composition, and graphic design. While it has a steeper learning curve than Lightroom, its capabilities are impressive, especially considering the zero price tag.
- Capture One (Professional Color Editing): Favored by many studio and commercial photographers, Capture One is renowned for its superior color handling, tethered shooting capabilities, and excellent RAW file processing. It's a premium product with a price point to match, geared towards professionals who demand the absolute best in image quality and color control.
- Affinity Photo (Budget-Friendly with Advanced Features): Often touted as a "Photoshop killer," Affinity Photo offers a one-time purchase model (no subscription) with a feature set that rivals Adobe's flagship. It handles layers, masks, advanced retouching, and RAW files with ease, making it an excellent choice for those seeking professional power without the recurring cost.
- Adobe Creative Cloud (Full Power for Advanced Users): This suite typically includes Lightroom and Photoshop, offering a comprehensive ecosystem for all your photography and design needs. Photoshop is the ultimate tool for pixel-level manipulation, compositing, and advanced retouching, making it indispensable for complex creative projects.
The Golden Rule: While software matters, mastering the craft is infinitely more important than the specific tool itself. Start with what you can afford and comfortably learn, then expand as your skills and needs grow. If you're pondering choosing the right editing software, consider your current skill level and what you aim to achieve.
The Core Curriculum: Unpacking Photo Editing Fundamentals
Once you've chosen your software, it's time to dive into the fundamental techniques that will elevate your photos. Think of these as the building blocks of every great edit. According to experts like Justin Bridges (whose Skillshare class often uses Adobe Lightroom as a teaching tool), mastering these areas is key.
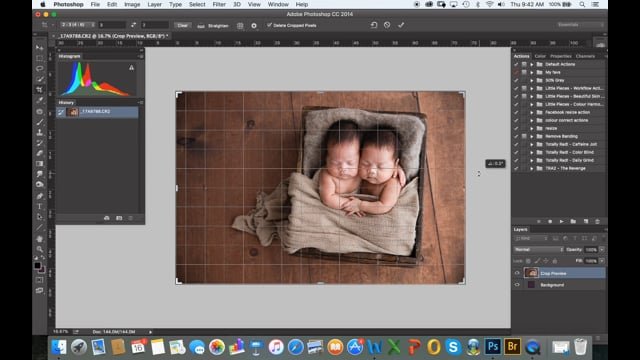
1. Mastering Composition: Cropping and Straightening for Impact
Even a perfectly exposed photo can fall flat with poor composition. Editing gives you a second chance to refine your frame.
- The Rule of Thirds: Imagine a 3x3 grid overlaid on your image. Placing key subjects or points of interest along these lines or at their intersections often creates a more balanced and dynamic composition than simply centering everything. Use your software's cropping tool, which typically displays this grid, to experiment.
- Leading Lines & Symmetry: Look for natural lines in your image that guide the viewer's eye. Cropping can enhance these. If your shot involves strong symmetry, ensure it's perfectly aligned to avoid distractions.
- Straighten Horizons and Verticals: A crooked horizon is an amateur tell. Use the straighten tool (often a simple drag or auto-correct feature) to ensure all lines are perfectly level. For architectural shots, correct converging verticals to make buildings stand tall and proud. A polished look begins with fundamental compositional adjustments.
2. Color Correction and White Balance: Painting with Light
Color is emotion. Understanding how to manipulate it is paramount to setting the right mood.
- White Balance: The Foundation: This is often the first adjustment you make. White balance ensures that white objects in your photo appear truly white, not tinted yellow, blue, or green. Use the eyedropper tool on a neutral gray or white area, or manually adjust temperature (warm/cool) and tint (green/magenta) sliders.
- Color Theory in Practice:
- Warm Colors (Reds, Oranges, Yellows): Evoke feelings of comfort, energy, passion, or coziness. Enhance these for sunsets, portraits, or food photography.
- Cool Colors (Blues, Greens, Purples): Suggest calmness, serenity, sadness, or professionalism. Ideal for landscapes, cityscapes, or minimalist scenes.
- Hue, Saturation, and Luminance (HSL):
- Hue: Changes the actual color (e.g., shifting greens towards yellow or blue).
- Saturation: Controls the intensity or purity of a color. Be careful not to over-saturate, which can make colors look artificial.
- Luminance: Adjusts the brightness of specific colors. For instance, decreasing the luminance of blues can deepen a sky, while increasing the luminance of yellows can brighten skin tones.
- Tone Curve: Fine-Tuning Tones: This powerful tool allows for incredibly precise adjustments to the light and dark tones of your image. An S-curve, for example, adds contrast by darkening shadows and brightening highlights. Each point on the curve controls a specific tonal range, giving you minute control over your image's dynamic range.
- Color Profiles and Calibration: For professional consistency, especially in print, manage your color profiles. Calibrate your screen regularly with a hardware calibrator. Work in color spaces like Adobe RGB for professional printing or sRGB for web and digital viewing. Consider exploring advanced color grading techniques to truly master your image's mood.
3. Retouching and Detail Enhancement: The Art of Subtlety
The goal here is enhancement, not obliteration. You want to refine without making it look fake.
- For Portraits (Skin):
- Healing Brushes & Spot Removal: These local tools are your best friends for removing blemishes, stray hairs, or dust spots. The healing brush samples nearby textures to blend imperfections seamlessly.
- Frequency Separation (Advanced): This technique separates texture and color information onto different layers, allowing you to smooth skin tones without losing crucial textural details. It’s a powerful but more complex method for achieving natural-looking skin.
- Avoid Over-Smoothing: Preserve natural skin texture! The aim is to make someone look their best, not like a plastic doll. Less is often more.
- For Landscapes/Architecture:
- Sharpening: Enhance edge contrast to make details pop. Be careful not to over-sharpen, which can introduce artifacts or noise. Apply sharpening selectively, often to areas of interest.
- Clarity & Dehaze: These sliders in Lightroom can dramatically improve the perceived sharpness and contrast, especially in hazy or atmospheric shots. Clarity works on mid-tone contrast, while Dehaze reduces atmospheric fog. Again, use with a light touch.
- Local Contrast: Similar to clarity but often more subtle, enhancing contrast within small areas of the image to bring out texture.
Remember, natural enhancements build trust and make your photos more believable. For more specific guidance, check out these beginner-friendly retouching tips.
4. Working with Layers and Masks: Precision and Non-Destructive Editing
These are the bedrock of advanced, flexible editing, especially in software like Photoshop or Affinity Photo.
- Layers: Transparent Sheets of Creativity: Imagine your image as a stack of transparent sheets. Each layer can hold a different edit – a color adjustment, a retouched blemish, a text overlay. This allows you to make changes independently without affecting the original image data below. You can turn layers on/off, change their opacity, and rearrange them, giving you incredible control and flexibility.
- Layer Blending Modes: These determine how a layer interacts with the layers beneath it. Modes like "Multiply" darken, "Screen" lighten, "Overlay" increases contrast, and "Soft Light" offers a more subtle effect. Experimenting with blending modes can unlock powerful creative possibilities.
- Masks: Editing with Pinpoint Accuracy: A mask is like a stencil. It allows you to selectively reveal or hide parts of a layer. White on a mask reveals the layer's content, black hides it, and shades of gray create semi-transparency. This means you can apply an adjustment (e.g., brightening) to only a specific part of your image, leaving the rest untouched. Masks are fundamental to non-destructive editing, as you're never permanently erasing pixels, only concealing or revealing them.
5. Image Output and Export Settings: Preparing for Your Audience
After all your hard work, the final step is to export your image correctly for its intended destination. The wrong settings can undo all your efforts.
- Resolution (PPI - Pixels Per Inch):
- Web/Digital: For screens, 72-96 PPI is standard. More won't look sharper, it'll just create a larger file size.
- Print: For high-quality prints, aim for around 300 PPI. This ensures crisp details when viewed up close.
- File Format:
- JPEG (Joint Photographic Experts Group): The go-to for web, social media, and general digital sharing. It uses "lossy" compression, meaning some data is discarded to create smaller file sizes. Perfect for quick loading and wide compatibility.
- TIFF (Tagged Image File Format): Ideal for professional printing or when you need a high-quality, uncompressed file. TIFFs are large but retain all image data, making them perfect for archiving or sending to a printer.
- PNG (Portable Network Graphics): Best for images with transparent backgrounds (e.g., logos, graphics). It uses "lossless" compression, preserving detail.
- RAW: Always keep your original RAW files! These are the untouched data directly from your camera's sensor, offering maximum flexibility for future edits. Never edit your original RAW file directly; always work on a copy or in a non-destructive editor.
- Color Space: This defines the range of colors an image can display.
- sRGB: The standard for web, social media, and most digital displays. If you're publishing online, always export in sRGB to ensure your colors look consistent across different browsers and devices.
- Adobe RGB: A wider color gamut than sRGB, often preferred for professional printing as it can reproduce a broader range of colors. Use this if your print lab specifies it.
- ProPhoto RGB: The widest color gamut, capable of representing almost all colors captured by your camera. Used by highly advanced professionals for archiving or when working with specialized printing processes.
Common Photo Editing Mistakes to Avoid at All Costs
Even with a solid grasp of photo editing fundamentals, it's easy to fall into traps. Being aware of these common missteps will help you create better, more believable images.
- Over-editing: This is the cardinal sin. Too much saturation, unnaturally smooth skin, overly bright colors, or harsh HDR effects scream "bad edit." Your goal is to enhance, not to drastically alter reality to the point of distortion. Aim to make the photo look like the best possible version of itself, not a fabricated one.
- Inconsistency: When editing a series of photos (e.g., from a wedding, a photoshoot, or for a brand), maintain a consistent style. Drastically different colors, brightness levels, or moods between images in a set can be jarring and unprofessional. Develop a signature style and apply it cohesively.
- Ignoring Small Details: Sharpening, noise reduction, and dust removal might seem minor, but they are crucial for a polished image. A tiny spec of dust on your sensor, if left unaddressed, can ruin an otherwise perfect shot, especially when printed large.
- Not Knowing When to Stop: It's easy to get lost in the editing rabbit hole. Take breaks. Step away from your screen for a few minutes (or even an hour) and then come back with fresh eyes. Compare your edited image to the original. If you can't tell what you've done, you're on the right track; if it looks wildly different, you might have gone too far. Trust your intuition.
- Editing JPEG Originals: While you can edit JPEGs, they have less data and thus less flexibility than RAW files. Repeated edits and saves on a JPEG can degrade its quality. Always try to shoot in RAW and edit those files non-destructively.
- Uncalibrated Monitor: If your screen isn't showing accurate colors, your edits won't translate correctly to other screens or prints. Invest in a monitor calibrator.
Your Burning Questions Answered: Photo Editing Insights
We all have those lingering questions when diving into a new skill. Here are crisp answers to some of the most common inquiries about photo editing fundamentals:
What's the biggest difference between RAW and JPEG files?
RAW files are like digital negatives, containing all the unprocessed data from your camera's sensor. This gives you maximum flexibility and quality for editing. JPEGs are already processed and compressed, offering smaller file sizes but significantly less editing room before quality degrades. Always shoot RAW if you plan to edit.
How important is color correction for a professional-looking photo?
Extremely important. Accurate color correction is foundational. It ensures skin tones look natural, whites are truly white, and colors pop without looking artificial. Poor color correction can make an otherwise great photo look amateurish.
What are the most basic steps in photo editing for a beginner?
Start with these:
- Adjust Exposure: Make sure your photo isn't too dark or too bright.
- Correct White Balance: Get your colors accurate.
- Tweak Contrast: Give your image some punch.
- Crop & Straighten: Improve composition and fix crooked lines.
- Subtle Sharpening: Add a touch of crispness.
Focus on subtle enhancements rather than drastic changes.
How can I avoid over-editing my photos?
Make small, gentle changes. Continually compare your edited image to the original. Take frequent breaks and get a fresh perspective. Ask yourself if the edit truly enhances the photo's natural beauty or if it's just making it look "processed."
Which file format should I use when exporting for different purposes?
- For Web/Social Media: JPEG (with sRGB color space) for small file sizes and wide compatibility.
- For Professional Printing: TIFF (often with Adobe RGB color space) for maximum quality and data retention.
- For Transparent Backgrounds: PNG.
What do layers and masks do in photo editing?
They enable non-destructive, precise editing. Layers allow you to make changes on separate "sheets" without altering the original image. Masks let you selectively apply or hide those changes to specific parts of an image, giving you total control and the ability to reverse edits at any time.
How do I develop a consistent editing style?
It takes practice and observation.
- Use Presets (as a starting point): Create or adapt presets that reflect a look you like.
- Study Color Grading: Understand how colors interact and how different palettes create different moods.
- Analyze Photographers You Admire: Deconstruct their style – what colors do they use? How do they handle light and shadow?
- Practice, Practice, Practice: The more you edit, the more intuitive your stylistic choices will become.
Do I need expensive equipment to do good photo editing?
Not necessarily. While a good monitor and capable computer help, the most crucial "equipment" is your understanding of the fundamentals, your eye for detail, and your ability to use the software. Many excellent results can be achieved on modest setups with dedication and skill.
Your Next Steps: From Fundamentals to Fluency
Mastering photo editing fundamentals is an ongoing journey, not a destination. You've now grasped the essential tools and techniques that empower you to transform your photographs from mere snapshots into impactful visual stories.
Your next steps should focus on putting this knowledge into practice:
- Choose Your Software: If you haven't already, pick an editing software that aligns with your budget and skill level. Start with a free trial of Lightroom or GIMP to get a feel for the interface.
- Practice Regularly: The best way to learn is by doing. Dedicate time each week to editing your photos, experimenting with different adjustments, and applying the techniques discussed here.
- Start Simple: Don't try to master every tool at once. Begin with basic adjustments like exposure, white balance, and cropping. As you gain confidence, gradually introduce more complex techniques like tone curves, local adjustments, and working with layers.
- Learn from Others: Watch tutorials (platforms like Skillshare, YouTube, and Adobe's own channels are invaluable), analyze the work of photographers you admire, and seek feedback on your edits.
- Develop Your Eye: Photography and editing are subjective arts. Over time, you'll develop your own unique style and an intuition for what makes an image truly compelling.
Remember, every professional started right where you are. With consistent effort and a curious mind, you'll soon be unlocking the full potential of your photos, creating images that not only look incredible but also genuinely reflect your unique artistic vision.